Music, voice-overs, extracted sound, clean-up and Beat Sync.
Text
Titles, animated text and auto captions.
Overlay
Picture-in-picture videos and photos.
Tip: tap a clip on the timeline to edit only that clip; tap empty space to edit every clip. Undo and redo sit at the top.
Pro camera and Apple Log
Record with full manual control from the home screen.
Tap Record, then choose PRO · LOG (iPhone 15 Pro and later) or HDR.
Tap a setting (ISO, shutter, white balance, focus) and scrub the dial; tap Auto to hand it back.
Pick a preview look so you see the finished colour while the recording stays clean.
Open the clip in a project and use the For Log folder in Looks.
Colour
From one-tap looks to the tools a colourist uses.
Looks, My Looks and LUTs
In Looks, tap a look; Strength blends it with your footage.
To keep your own grade, open My Looks and tap Save look. Hold a saved look to rename or delete it.
To use a LUT, tap Import LUT in My Looks and pick a .cube file from Files. It applies like a look, with Strength.
Tip: 3D LUTs up to 65 points work. Imported LUTs stay on your device.
Adjust, Colors and Curves
Adjust has the light, colour, effects and detail sliders you know from photo editors. Colors changes the hue, saturation and luminance of eight colour ranges. Curves has Luma, Red, Green, Blue and Hue vs Saturation.
Drag a slider; double-tap it to reset.
In Curves, tap to add a point, drag to move it, and double-tap a point to remove it.
Grade wheels and HDR zones
The 3-Way tab tints shadows, midtones and highlights; drag inside a wheel to push colour, and use the slider below to brighten or darken that range.
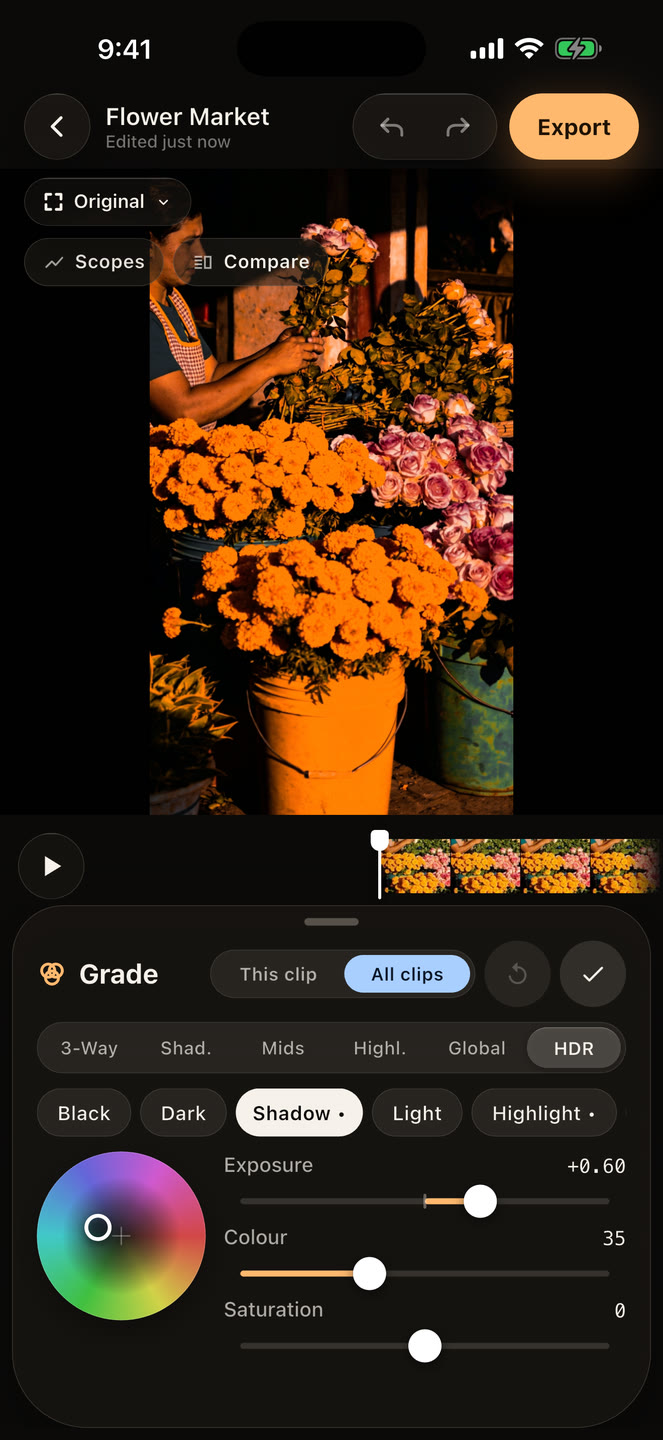
Open Grade › HDR for six zones from Black to Specular.
Pick a zone, then set its Exposure in stops, a colour push on the wheel, and Saturation.
Tip: zones overlap softly, so lifting Shadow by half a stop opens up the dark areas without greying the blacks.
Color Warper
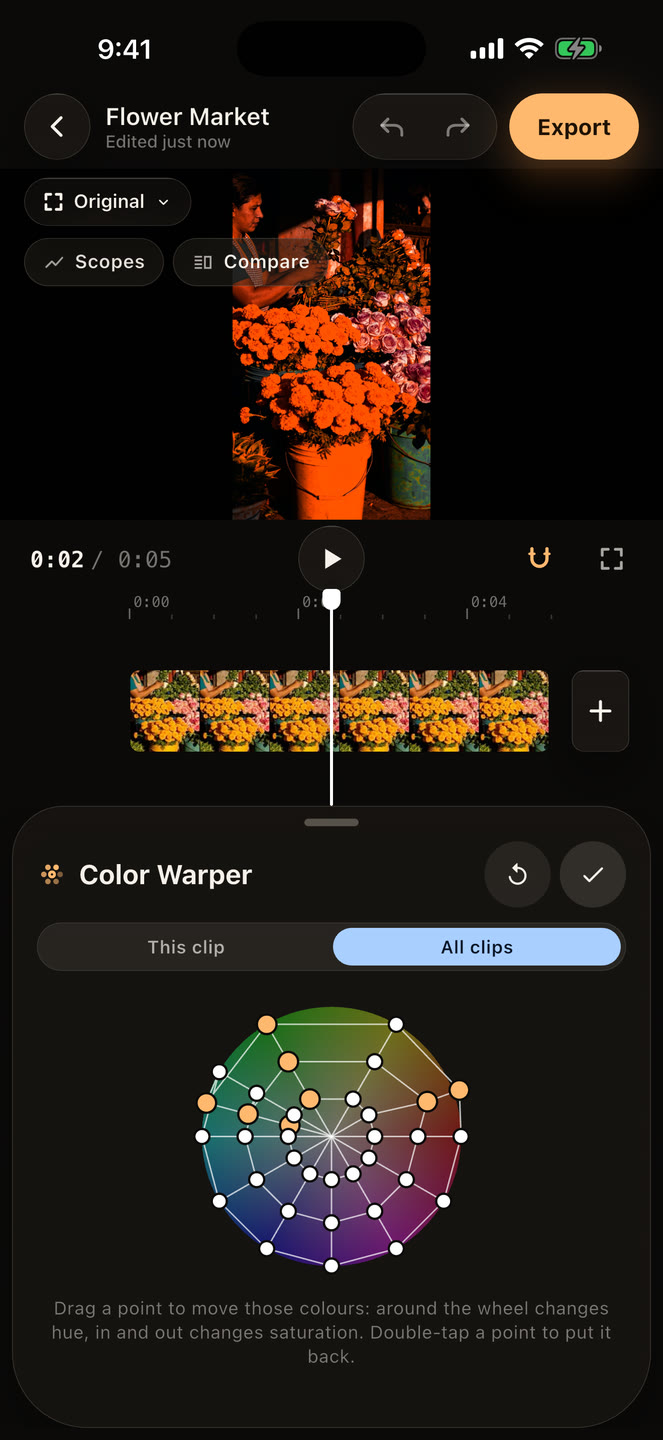
Reshape colours by dragging points on a mesh over the colour wheel.
Open Color › Warper.
Drag a point around the wheel to change that colour's hue, or in and out to change its saturation. Colours between points follow smoothly.
Double-tap a point to put it back; the reset button clears the whole mesh.
Tip: for teal and orange, pull the green points towards teal and leave the skin-tone points where they are.
Film stocks
In Film, pick a stock and its print, set Strength and push or pull up to two stops, then add halation, bloom, grain, film breath and gate weave.
Shot Match
With two or more clips, open Color › Match.
Hold the clip you like to make it the Reference; tap others to include or skip them.
Set Strength and tap Match. Exposure, contrast and white balance are matched; fine-tune in Adjust.
Scopes and Compare
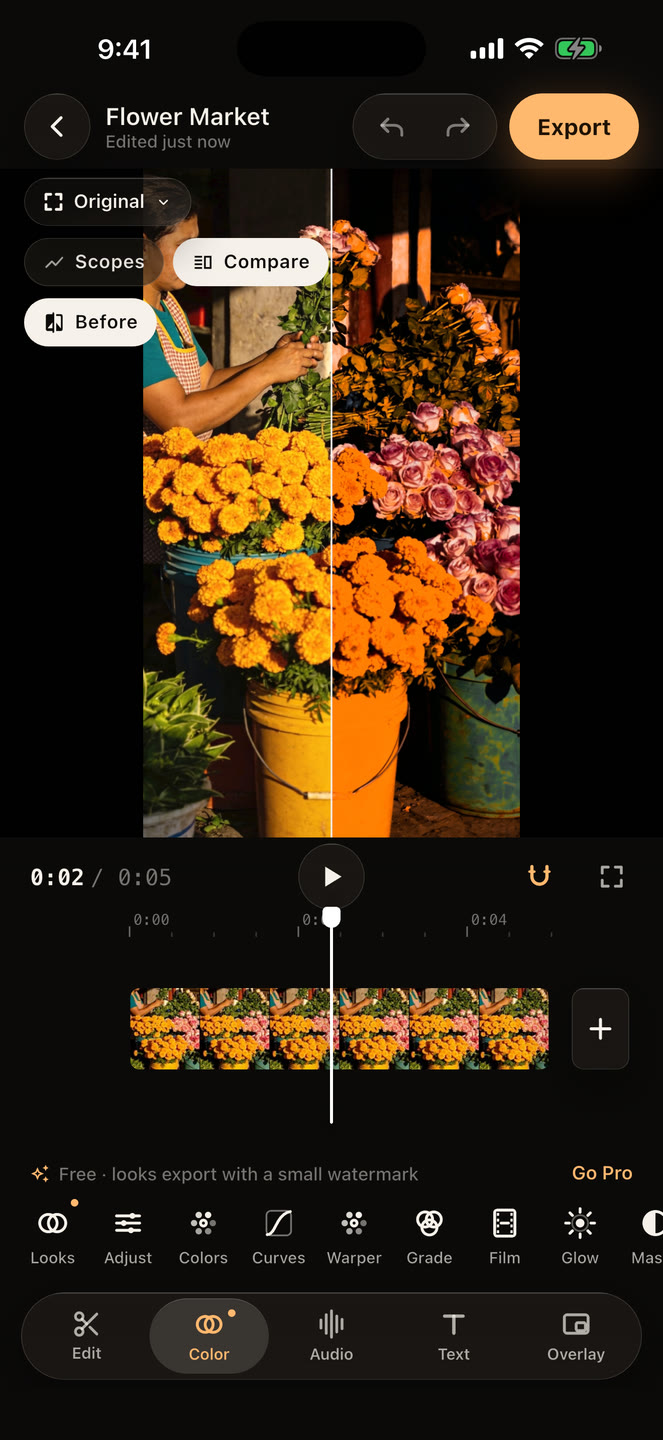
In Color mode, tap Scopes on the viewer for a live waveform, RGB parade, vectorscope (with a skin-tone line) or histogram.
Tap Compare for a split screen: drag the divider across the viewer. Choose Before to see the clip ungraded, or another clip to match its colour by eye.
Masks and AI
Grade part of the picture, or let CineCut find it for you. All AI runs on your iPhone.
Masks and correction layers
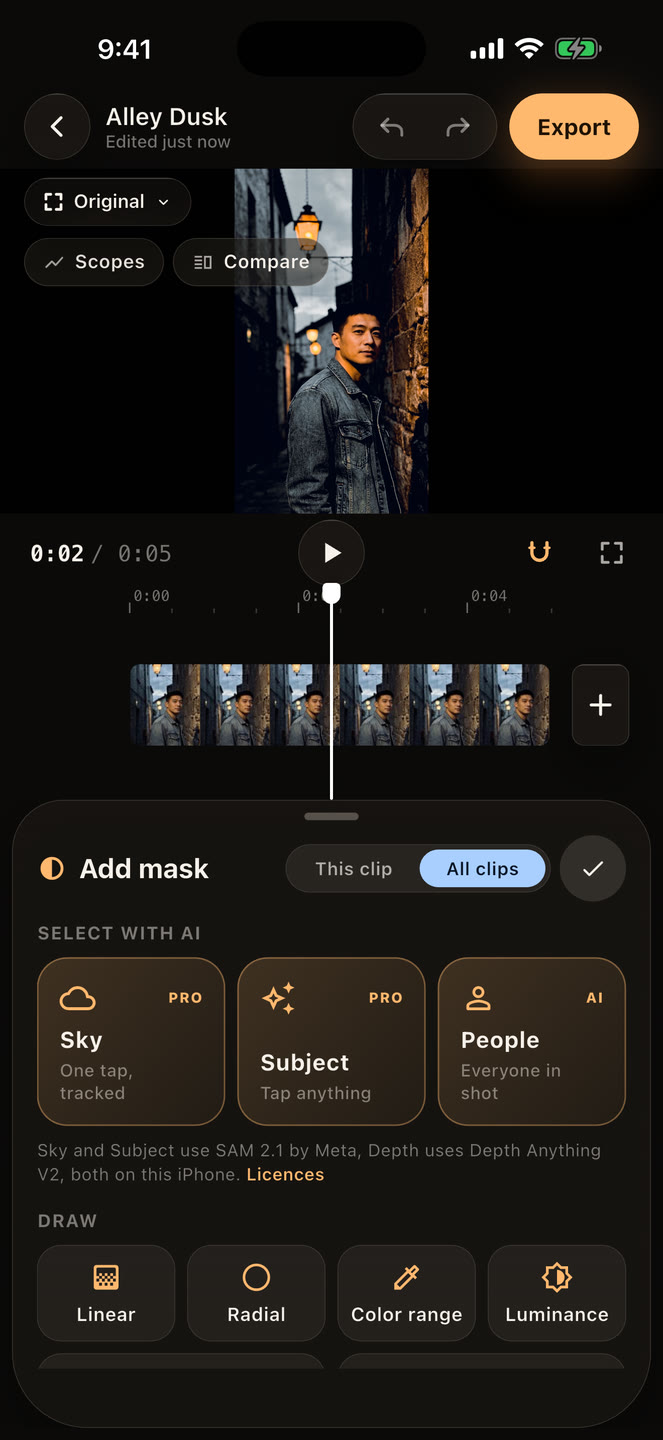
Open Color › Masks and choose a mask: Linear, Radial, Color range, Luminance, or Layer for the whole frame.
Shape it on the viewer (drag the handles), then use the Light, Color and Blur tabs for what changes inside it.
The red overlay shows the selection; it hides while you drag a slider so you can see the result.
In the list, hold to reorder, tap the eye to hide one, and stack Layers to keep corrections separate.
AI Sky and Subject PRO
In Masks, tap Sky (found automatically) or Subject, then tap what you want on the viewer.
Refine with Add and Remove above the timeline.
Tap Track through clip. If it slips somewhere, scrub there and tap the subject again: that frame becomes a keyframe.
Tip: needs iOS 17 or later.
Depth and cinematic blur PRO
CineCut works out how far away everything in the shot is, so you can select by distance.
In Masks, tap Depth. The clip is analysed once.
Set From and To (0 is the farthest part of the shot, 100 the nearest).
For background blur, select the far range and raise Blur in the Blur tab; Bokeh makes highlights swell into discs.
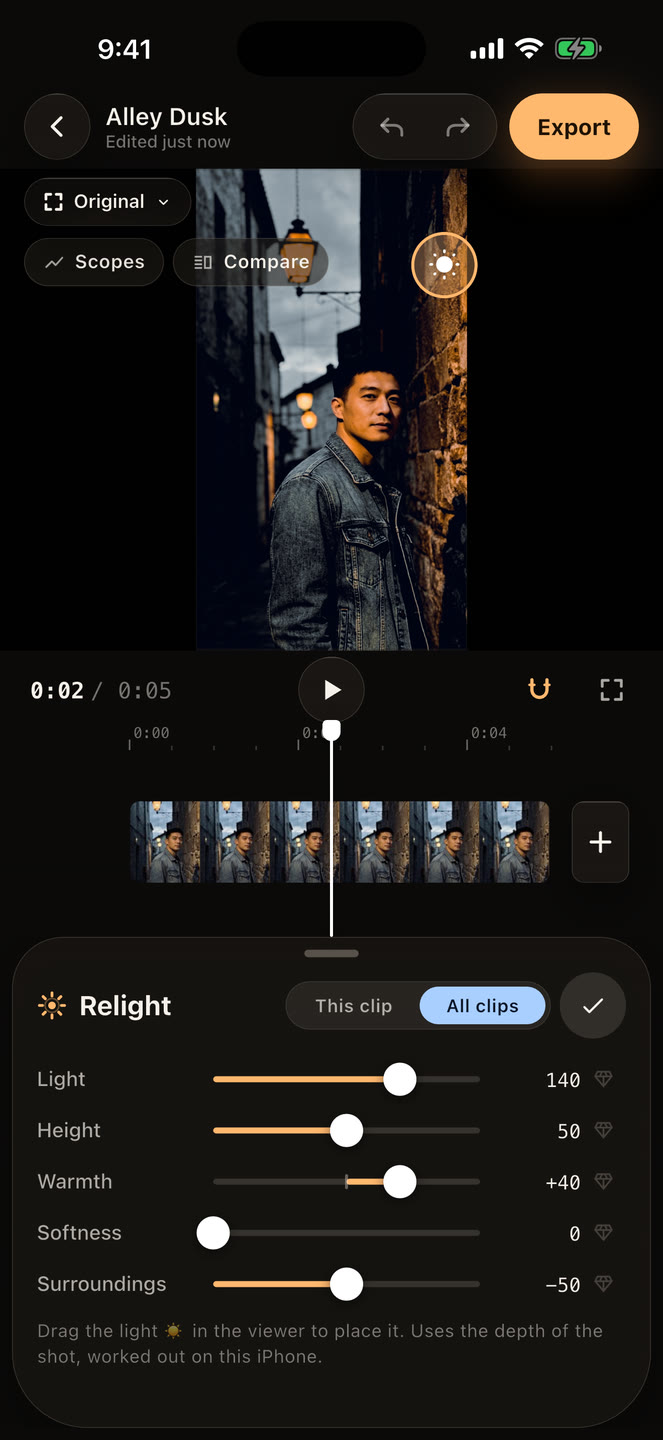
Relight PRO
Add a light after the shot, shaped by the depth of the scene.
Open Color › Relight (the clip's depth is worked out the first time).
Drag the ☀ on the viewer to place the light.
Set Light, Height, Warmth and Softness; lower Surroundings to darken everything the light doesn't reach.
Face Refinement PRO
Open Color › Face. Faces in the clip are found once and followed automatically.
Use Smooth skin, Brighten eyes, Whiten teeth and Slim face.
Tip: a little goes a long way; 20 to 40 looks natural on most faces.
Remove an object PRO
CineCut fills the object with the real background, taken from nearby frames where it has moved out of the way.
Select the clip and tap Remove in the Edit toolbar.
Tap the object in the viewer; refine with Add and Remove.
Tap Track through clip, then Remove this object. A cleaned copy of the clip replaces it; Undo brings the original back.
Works best when the object moves across the frame or the camera moves past it. Parts that are never uncovered get a soft fill from around them.
Motion
Animate any setting, ramp speed and keep the subject framed.
Keyframes
The ◆ next to a slider animates it. Keyframes work on Adjust, Strength, Grade, HDR zones, Film, Glow, Transform, Face, Relight, text, overlays and volume.
Select a clip, move the playhead, and tap ◆ to add a keyframe with the current value.
Move the playhead, change the slider: a second keyframe is added. The setting now animates between them.
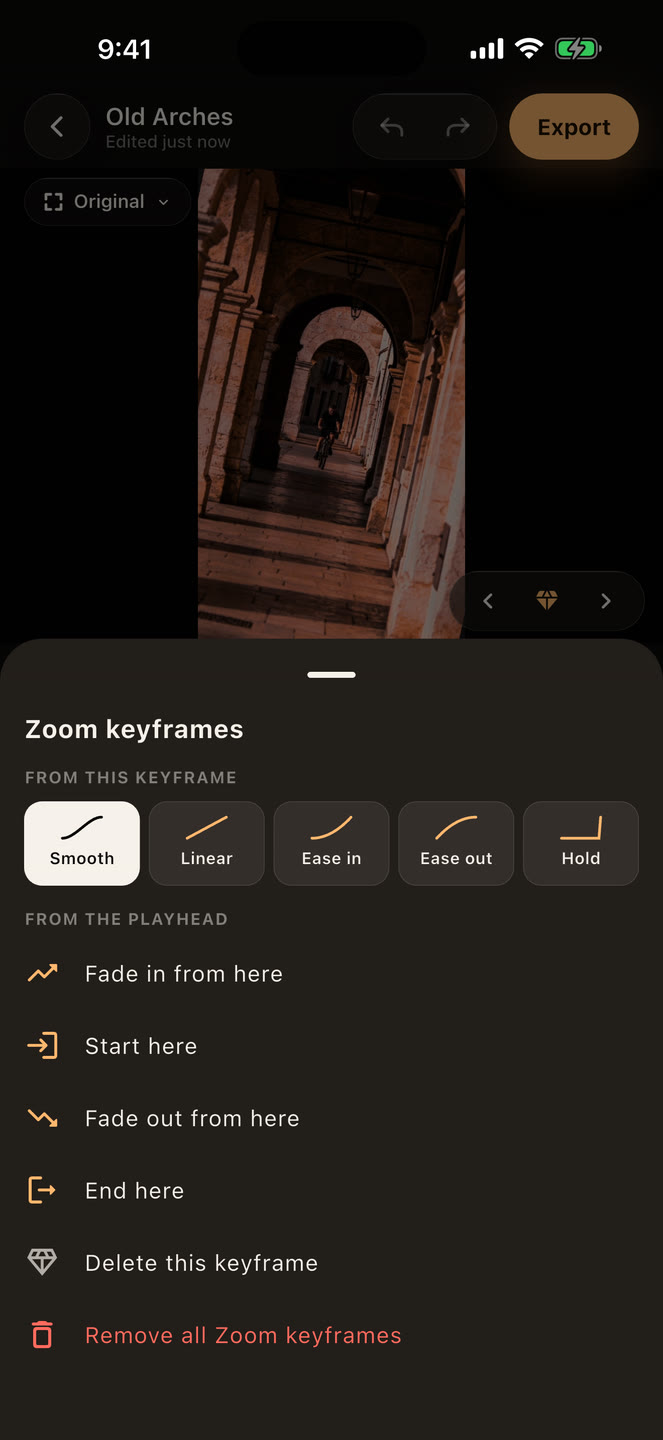
Hold ◆ for more: choose how it moves on (Smooth, Linear, Ease in, Ease out or Hold), or delete keyframes.
Use ‹ ◆ › on the viewer to jump between keyframes.
Start an effect at a specific point: put the playhead there, hold ◆ next to the setting and choose Fade in from here (half a second) or Start here (a cut). Fade out from here and End here do the reverse.
Transform and zoom
Select a clip and tap Edit › Transform.
Drag the picture to move it and pinch to zoom, or use the sliders. Rotate 90° and Mirror are here too.
For a slow push-in: ◆ Zoom at the start at 100%, then at the end set 120%.
Speed ramps
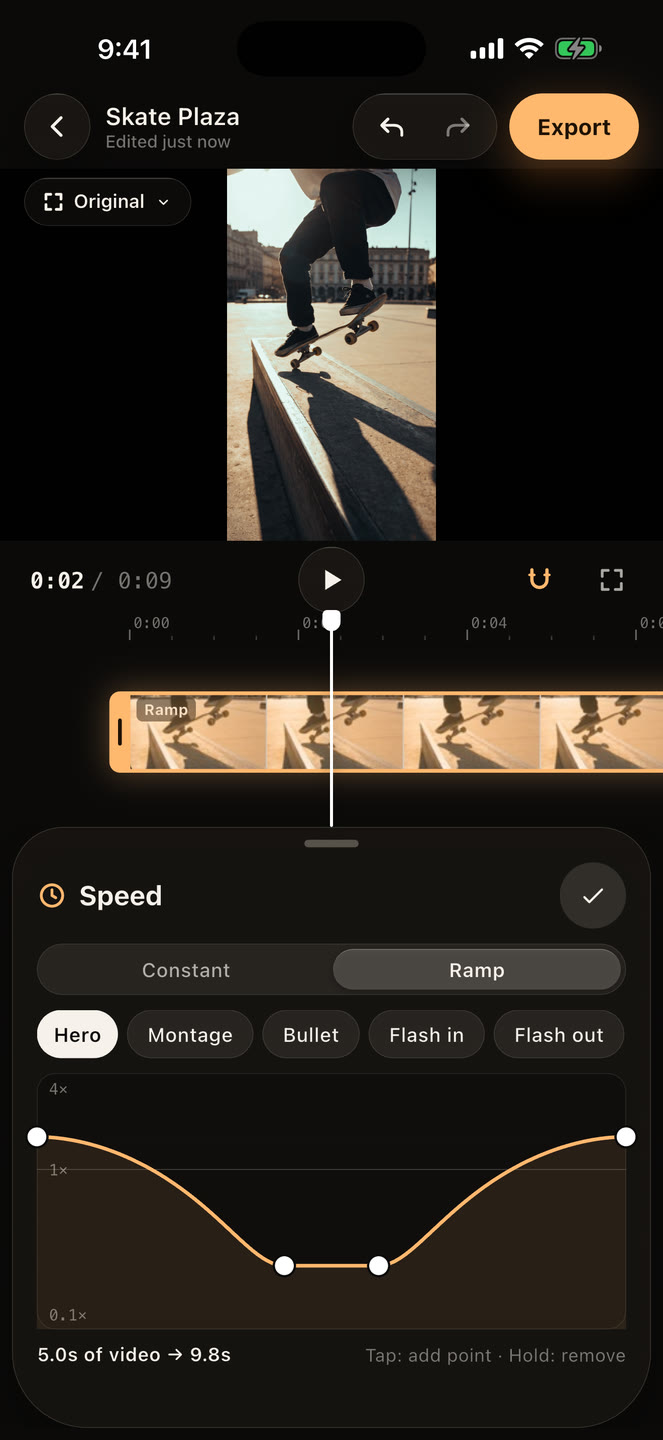
Select a clip and tap Speed, then Ramp.
Pick a preset (Hero, Montage, Bullet, Flash in, Flash out) or shape the curve: tap to add a point, drag to move it, hold to remove it.
The clip's new length shows under the curve; the timeline updates when you let go.
Smart Reframe
With no clip selected, open Edit › Canvas, pick a ratio such as 9:16 and turn on Smart Reframe.
Choose Smooth, Responsive or Locked, and Zoom if you want a tighter frame.
Tip: it follows people first, then whatever draws the eye. Great for turning 16:9 footage into 9:16 reels.
Stabilise
Select a clip, tap Stabilise and set the smoothness. The clip is analysed once.
Text and captions
Titles, animation and subtitles that keep up with your speech.
Text and animation
Open Text and tap Add text.
Type, pick a font and colour; drag the text in the viewer to place it and pinch to resize.
Use Animate for in and out effects, Glow for a halo, and ◆ on Size, Opacity or Position to animate it.
Auto captions
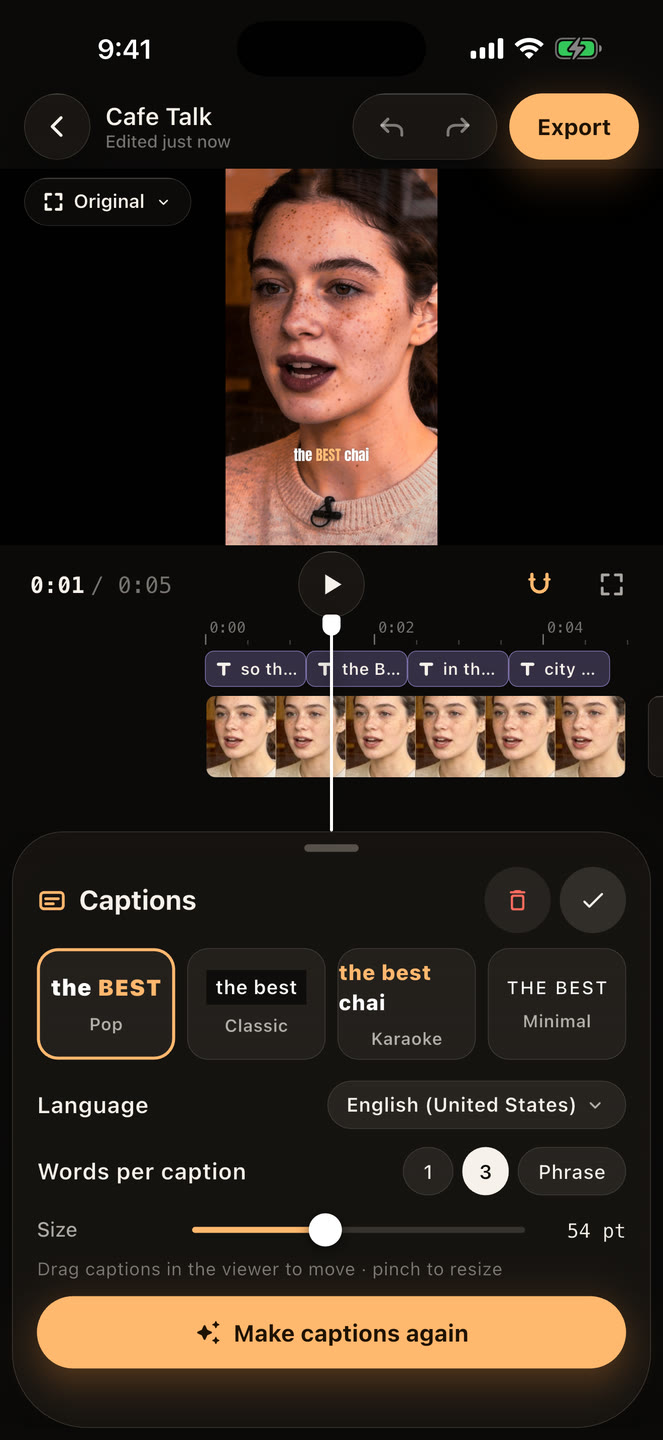
Open Text › Captions.
Choose a style (Pop, Classic, Karaoke, Minimal), the language and how many words per caption.
Tap Generate captions. The first time, allow speech recognition.
Drag the captions in the viewer to move them and pinch (or use Size) to resize; they all move together.
Tap any caption on the timeline to fix a word.
Tip: most languages are recognised on your iPhone. Languages marked “needs internet” use Apple's servers.
Text that follows a subject
Select a text and open its Follow tab.
Tap Follow a subject, then tap the person or object in the viewer.
Choose Above, Below, Left or Right and the Offset. Use Retrack if it drifts.
Sound
Music, voice and timing to the beat.
Music, voice and clean-up
In Audio, add music from the library or Files, record a voice-over, or extract the sound from another video. Select a sound and tap Clean up to isolate voices or remove hiss, hum and wind.
Beat Sync
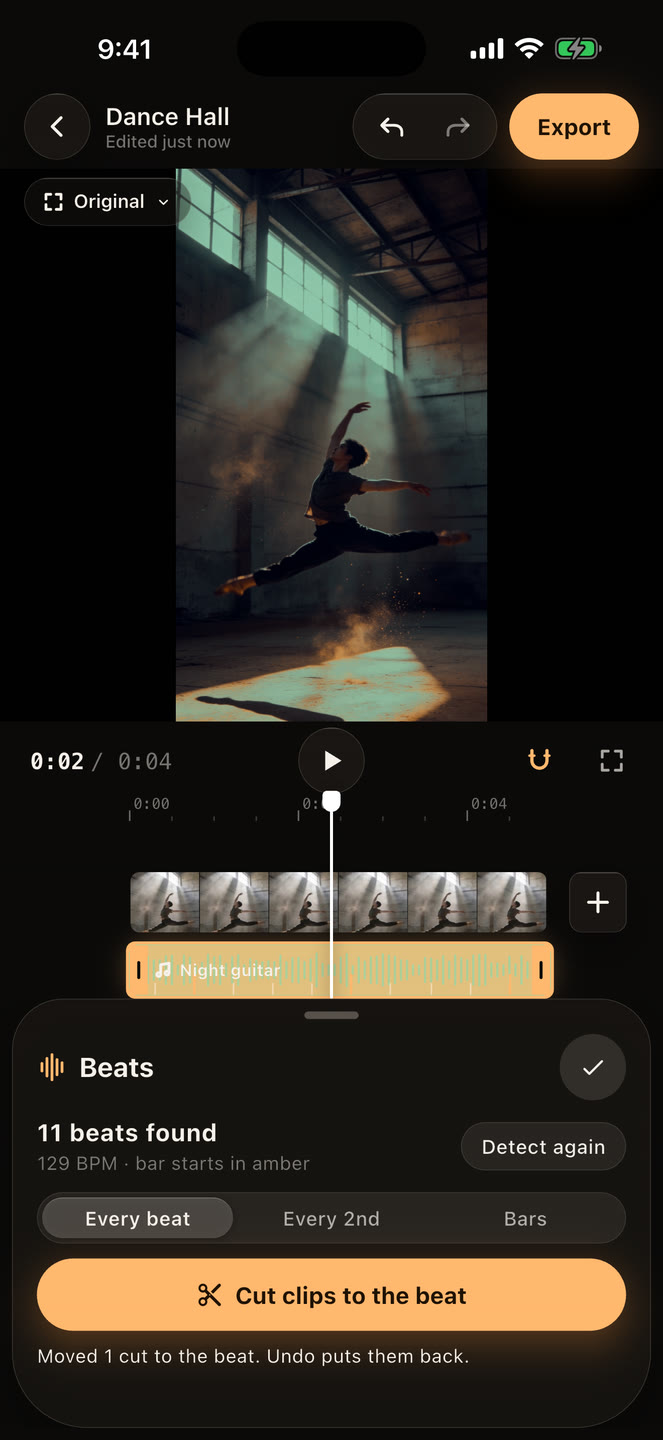
Select the music on the timeline and tap Beats. Beats appear as ticks, with bar starts in amber.
Choose Every beat, Every 2nd or Bars.
Tap Cut clips to the beat, or drag clip edges: they snap to the beats while the magnet is on.
Volume and fades
Select a clip or a sound and open Volume. Set Fade in and Fade out, or tap ◆ next to Volume to keyframe it: for example, dip the music while someone speaks.
Export and Pro
Export
Tap Export, choose the size (up to the original, including 4K) and frame rate, then save to Photos or share. HDR footage exports as HDR.
Pro and subscriptions
CineCut Pro removes the watermark and unlocks every look and the Pro tools (AI masks, Depth, Relight, Face Refinement and object removal). To restore on a new device, open the Pro screen and tap Restore. To cancel: Settings › your name › Subscriptions › CineCut.
Troubleshooting
Common questions
Captions don't work
Allow speech recognition in Settings › Privacy & Security › Speech Recognition › CineCut. Music-only clips have no speech to caption.
AI Sky or Subject is missing
It needs iOS 17 or later.
“Reading depth” or “Finding faces”
Each clip is analysed once and remembered; longer clips take longer.
My export looks different in Photos
HDR video looks brightest on HDR screens. On other screens Photos tone-maps it.
Still stuck?
Email us with your iPhone model and what you tried.